Starfish ETL Scheduler
Installation
The Scheduler is a run as Windows Service. It may installed on any server which has access to the web service, but for the sake of simplicity it is recommended to be installed the same server as the Starfish Engine. The Scheduler reads in the jobs’ configured schedules and launches them at the appropriate times.
Installation Steps
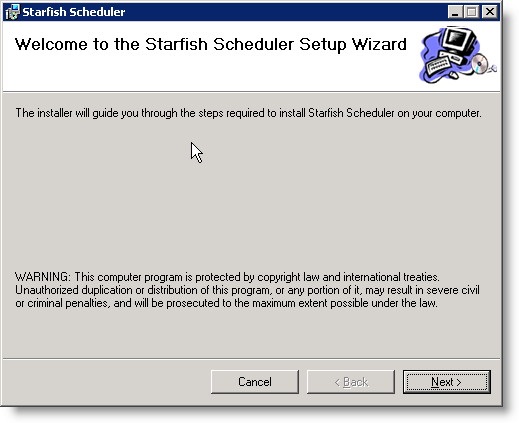
1. Run StarfishSchedulerSetup.msi on the desired server.
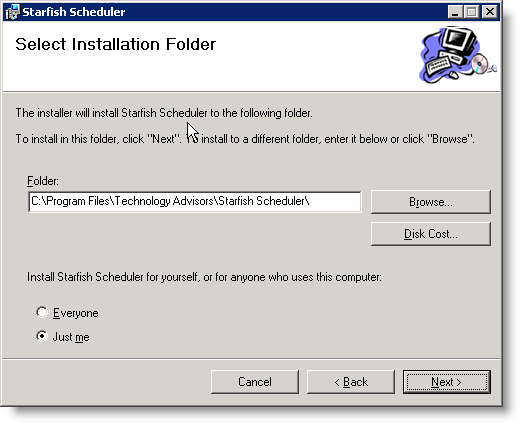
2. Select the installation folder, and the default access.
3. Click next and complete installation.
Configure The Starfish Scheduler
Setting The Scheduler's Engine Web Service URL
If you changed the default Engine's web service URL, you must update the default web service location. To do this, open the .config file in the install path (“C:\Program Files\Starfish\Starfish Scheduler\StarfishScheduler.exe.config”) with a text editor.
Near the end of the file, change http://localhost/StarfishEngine/StarfishEngine.asmx to the location of your custom web service URL. Ex: http://localhost:8080/StarfishService.asmx.
Please pay special attention to if you are editing the HTTP or HTTPS section of the config file, or edit both sections.
Scheduler Config Settings
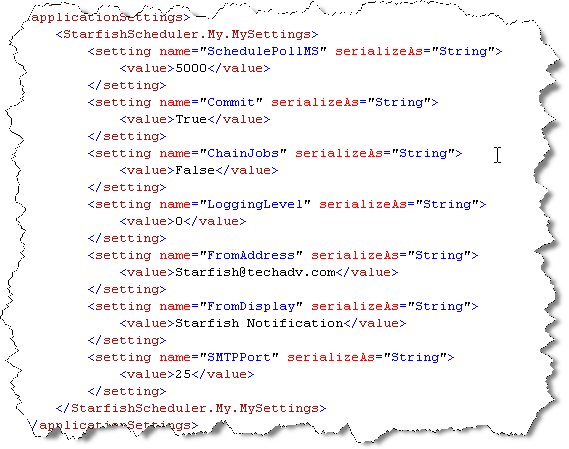
A number of other options may be changed through the C:\Program Files\Starfish\Starfish Scheduler\StarfishScheduler.exe.config config file.
| Setting | Description |
|---|---|
| SchedulePollMS | Interval in milliseconds on how often the Service should cycle to check if it needs to execute any Jobs based on the schedules. Default is 5 seconds. |
| Commit | True/False, whether Jobs executed through the Scheduler should be committed to the destination database. Default is True. |
| ChainJobs | True/False, whether Jobs executed through the Scheduler should automatically call the next Job configured in Job Changing. Default is True. |
| LoggingLevel | Level of logging to return through notification.0=None, 1=Low, 2=Medium, 3=High |
| FromAddress | The email address notifications should come from. |
| FromDisplay | The display name of the notification email address. |
| SMTPPort | Port of your SMTP server. Default is port 25. |
Configuring for use with several IIS Applications
Why?
So you can run multiple integrations on a single server.
How?
Note that these instructions are a preliminary outline. If you need help, please contact support@starfishetl.com.
- Make a copy of the default installed StarfishEngine folder found in C:\inetpub\wwwroot\
- Rename the folder. Something like "StarfishETLERPIntegration" or "StarfishETLTEST".
- Ensure your new folder has the proper Security settings.
- Right click on the Folder -> Properties -> Security Tab.
- Confirm that System, Administrators and IIS_IUSRS have "Full control" of the folder.
- Right click on the Folder -> Properties -> Security Tab.
- Open Internet Information Services (IIS) Manager.
- Open Application Pools and "Add Application Pool". Give it the same name as the folder you copied. Set the .NET version and Pipeline Mode to the same as the default Connect Creatio Application Pool.
- Find the folder you copied in the Sites -> Default Web Site tree. It will likely look like a folder. If it does, right click and select "Convert To Application". Make sure to select your new Application Pool.
- Surf to your new Application to test. The URL will be something like: http://localhost/StarfishTEST/StarfishService.asmx.
- Open Application Pools and "Add Application Pool". Give it the same name as the folder you copied. Set the .NET version and Pipeline Mode to the same as the default Connect Creatio Application Pool.
- Open your map in the StarfishETL Admin and point StarfishETL Admin to this new Web Service URL.
- Deploy your map.
- Edit the StarfishScheduler.exe.config file found in C:\Program Files\Starfish ETL\Starfish Scheduler\. Change the applicationSetting section for <setting name="AdditionalServices" serializeAs="Xml">. This tells the Starfish Scheduler to look at multiple Web Service URLs.
            <setting name="AdditionalServices" serializeAs="Xml">
                <value>
                    <ArrayOfString xmlns:xsi="http://www.w3.org/2001/XMLSchema-instance" xmlns:xsd="http://www.w3.org/2001/XMLSchema" />
                </value>
            </setting>
- to:
            <setting name="AdditionalServices" serializeAs="Xml">
                <value>
                    <ArrayOfString xmlns:xsi="http://www.w3.org/2001/XMLSchema-instance" xmlns:xsd="http://www.w3.org/2001/XMLSchema">
						<string>http://localhost/StarfishERPIntegration/StarfishService.asmx</string>
					</ArrayOfString>
                </value>
            </setting>
- Restart the StarfishETL Scheduler service.
Related Articles
Starfish ETL Monitor
Installation Beginning with Starfish ETL 3.8, the StarfishETL Monitor service is included and created when you install the StarfishETL Scheduler. The Monitor service's Startup Type is set to 'Manual' by default. If you wish to use this service, you ...Starfish ETL Admin
You will install the Admin tool on the workstation where you plan to do your job development. The installation requires the .NET Framework 4.0, and will need the ability to access the web service set up in the previous step. An easy way to test this ...Starfish Ray
Overview The Starfish Ray is a light-weight footprint service installed on a client machine which enables the movement of data from a system behind the firewall to other cloud-based systems. Our cloud hosted Starfish software facilitates this ...Installation
Server Requirements This short guide has all the technical information you need to know about the server requirements for StarfishETL. Installation Instructions StarfishETL Engine This guide is designed to get the backend of StarfishETL running ...StarfishETL Updater
Update Wizard StarfishETL has a built-in updater. To start, click the Starfish button and select “Check for Updates” or launch StarfishUpdater.exe directly from within the Connect Creatio Admin installation path. NOTE: It is often times necessary to ...


