StarfishETL Updater
Update Wizard
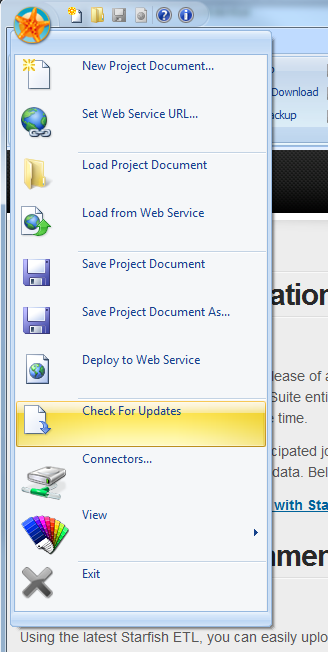
StarfishETL has a built-in updater. To start, click the Starfish button and select “Check for Updates” or launch StarfishUpdater.exe directly from within the Connect Creatio Admin installation path.
NOTE: It is often times necessary to start StarfishUpdater.exe with "Run-As Administrator".
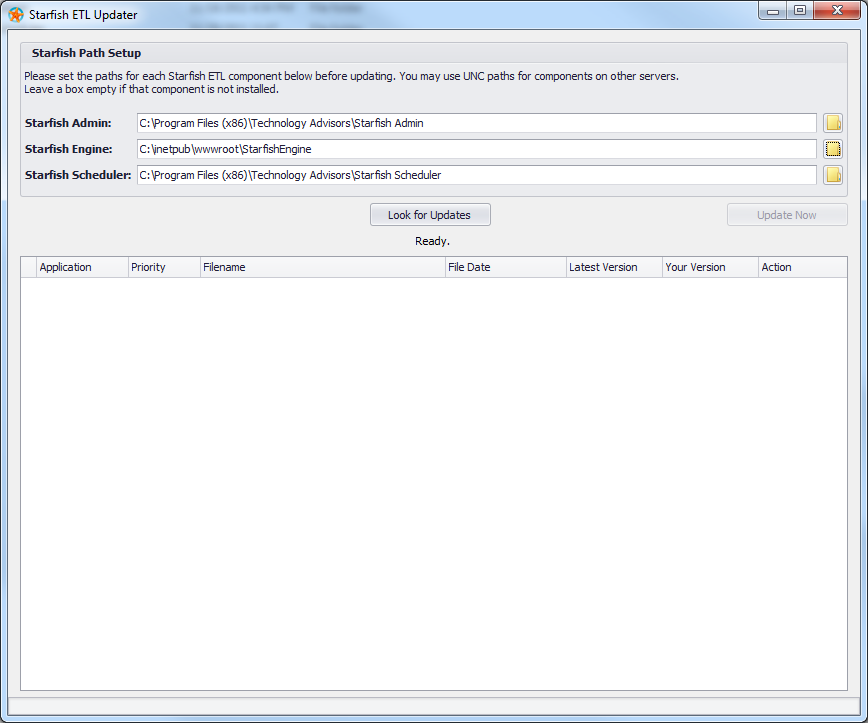
The first time the Updater is run, you'll have to supply the paths to the StarfishETL components. If your StarfishETL Engine is installed on another server, UNC paths are supported. If you don’t have a certain component installed (such as the Scheduler), you may leave the path empty.
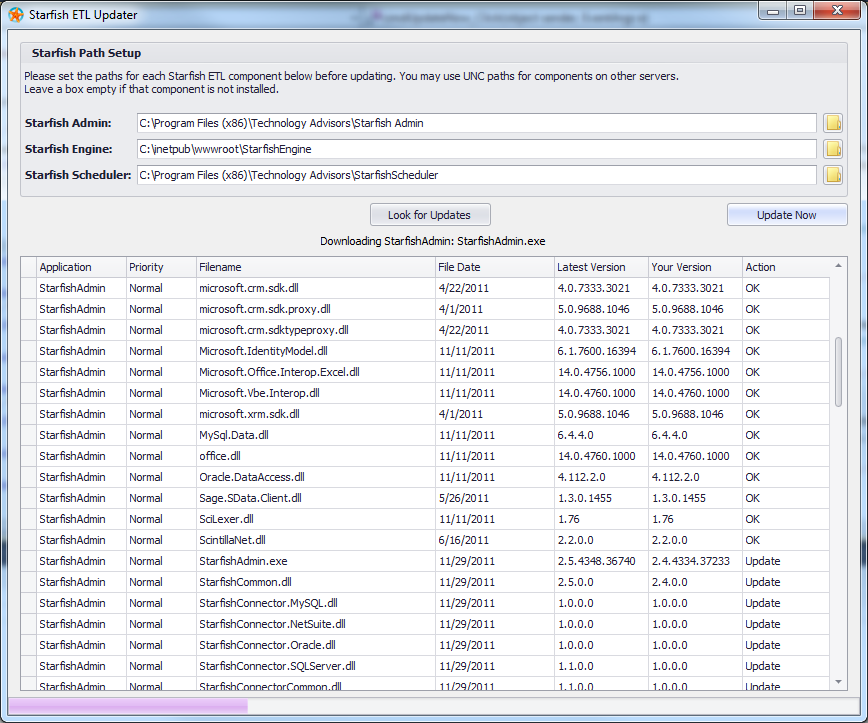
Now you may click the “Look for Updates” button. If the updater finds out of date or missing files, the “Update Now” button will become available. (Files are compared by MD5 hash) Before proceeding, it is recommended that you close out StarfishETL Admin and shut down the StarfishETL Scheduler service if running. Now you may press the “Update Now” button. This will download and replace the necessary files from StarfishETL servers.
Manually running the Update Wizard as Administrator
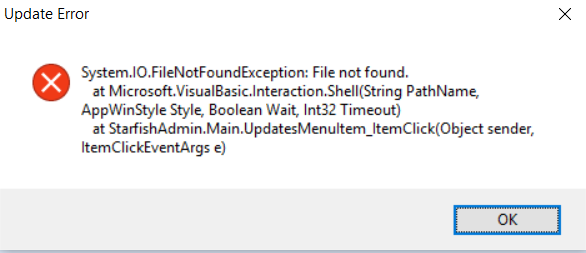
If you run into errors, you may need to run StarfishUpdater.exe as administrator. To do this, surf to where you installed the Starfish Admin program. Generally: C:\Program Files (x86)\Starfish ETL\Starfish Admin\. Find StarfishUpdater.exe, right click on it and select Run as Administrator.
Note that you may need to be logged into the computer as a local Admin.
Upgrading StarfishETL versions 3.x and 4.x
Earlier versions of StarfishETL require you to uninstall and reinstall the On-Prem version to upgrade.
- The Xref folder
- engine.db file
- Web.config file
5. After installation is complete copy this file and folder from your backup into the new installation:
- The Xref folder
- engine.db file
6. Take note of any changes you made to your web.config file and manually update those settings within the new web.config file. Do not simply overwrite this file from your backup.
Related Articles
StarfishETL security features
StarfishETL security features Compliance and data privacy · No data kept at rest on StarfishETL iPaaS servers · Data in motion is encrypted using HTTPS Infrastructure protection · StarfishETL iPaaS servers hosted on AWS · Servers are hosted on the ...StarfishETL Cartographer 2-factor Authentication (2FA)
The latest update for StarfishETL Cartographer has 2-factor authentication (2FA) enabled. Update applied to StarfishETL Cartographer servers March 26, 2020. This feature is part of the StarfishETL product strategy to continually improve your ...StarfishETL iPaaS Logging Features and Settings
StarfishETL iPaaS Logging Features and Settings StarfishETL iPaaS has a number of options for logging and monitoring integration activity. Logging is required at various stages of the integration mapping process, during the testing phase prior to ...Adding Team Members to your StarfishETL Instance
Adding users to your instance is an easy process that only requires a few steps. During this process, you can also assign access to specific projects within the account. Log into your StarfishETL instance. Click on the “Setup” tab in the toolbar. ...Implementation Options
StarfishETL Implementation Options StarfishETL On‐Prem – Install on your own server. Pro Most secure option. Everything is behind the firewall Data doesn’t leave your organization Con If not implementing yourselves, you will need to ...


